Battle of Romani: Turkish Force vs. Suez Canal Defenders
New Zealand
Military
Global Trade
4 min read
Updated By: History Editorial Network (HEN)
Published:
Updated:
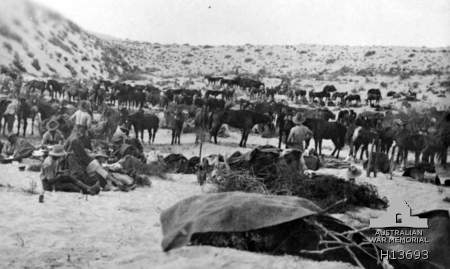
In the Battle of Romani, Turkish forces aimed to advance towards the strategically important Suez Canal. The location of the battle, known for its harsh desert conditions, played a significant role in the outcome.
Facing the Turkish advance was a combined force of British, Australian, and New Zealand troops, led by General Archibald Murray. The Allies were determined to defend the vital lifeline of the Suez Canal, which connected the Mediterranean Sea to the Red Sea and allowed for faster trade routes between Europe and Asia.
The battle began with intense skirmishes in the sandy dunes and rocky terrain around the Romani settlement. Both sides engaged in fierce combat, using rifles, machine guns, and artillery to gain the upper hand. The Allies, despite being outnumbered, utilized their knowledge of the terrain to outmaneuver the Turkish forces.
After days of fierce fighting and enduring harsh desert conditions, the Allies emerged victorious. The Turkish forces were forced to retreat, marking a significant turning point in the campaign. The Battle of Romani showcased the resilience and strategic prowess of the Allied troops, particularly the New Zealand forces, who played a crucial role in securing the victory.
The outcome of the battle had a lasting impact on the control of the Suez Canal, ensuring that it remained in Allied hands and safeguarded crucial supply lines during the conflict. The successful defense of the canal boosted morale among the Allied forces and strengthened their position in the region.
#BattleofRomani #SuezCanal #NewZealandTroops #AlliedVictory
Explore the Life Moments of